Workflow
First step to use HiPathia is to be logged in. Please visit Logging in to further information on this step.
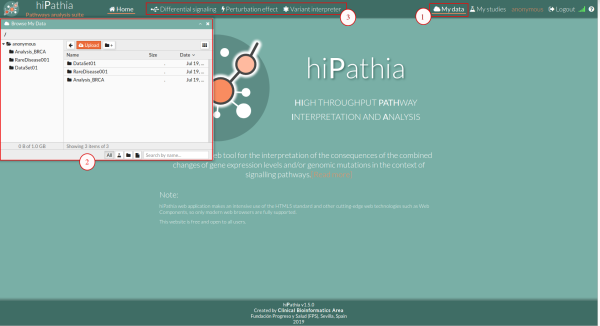
HiPathia data is arranged in folders as in a personal computer. You can upload data to any folder and organize it as desired (1). To learn how to upload data to HiPathia, please visit Upload your data. By clicking on My data, the data panel will appear (2), and by clicking again it will disappear.
HiPathia has four different tools, displayed in the main menu (3). For further information on each tool please visit What can do HiPathia for you.
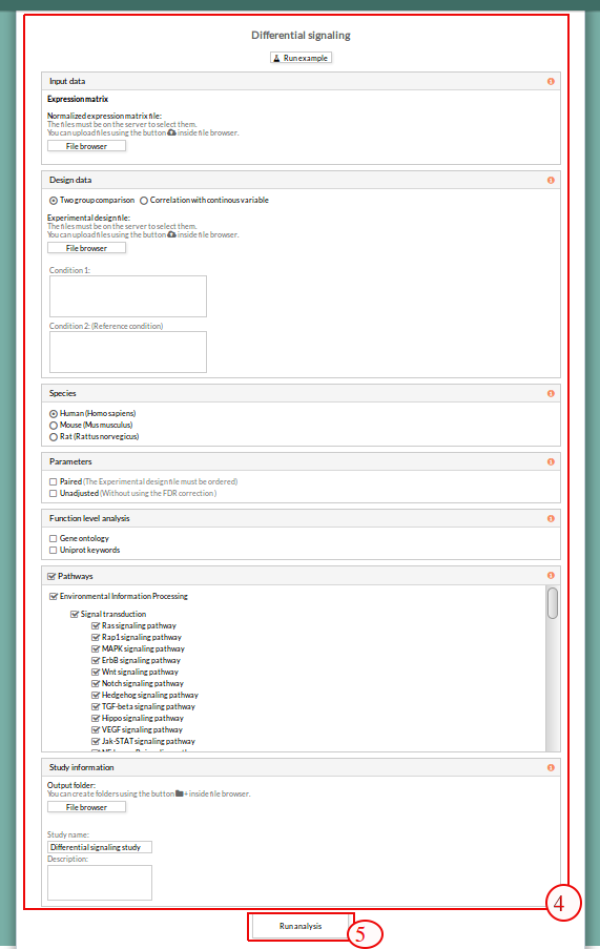
By clicking the desired tool in the menu, the empty form of the tool will appear (4).
To launch a study/analysis in a tool you need to fill in the required information of the input form. You will find a specific tutorial about how to fill in the input data and interpret the results in Differential signaling,Prediction Perturbation effect and Variant interpreter. Each time you press the Run analysis button of a tool (5) a study is created.
You can visualize your launched studies by clicking on the My studies button, on the right of the menu bar (6).

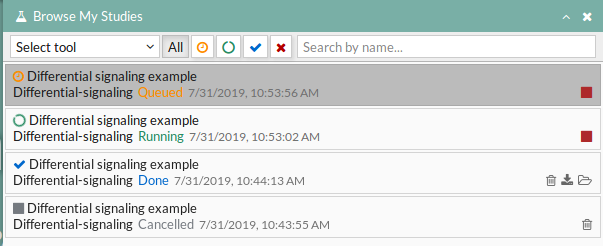
A panel called study panel will appear showing all your studies and their state (7). Study states are:
- Queued: The information has been processed and the study has been sent and waits to be processed.
- Running: The study is in progress.
- Done: The study has ended and the results are available to visualize and download.
- Cancelled: The study was canceled before finishing.
For visualizing the results of a study labeled as Ready, click on it in the study panel (8). The results will appear in the interaction panel. The results of each study are stored in the folder that the user selected as an output directory. Results can be download either from there or from the results form to your computer.


